Launch and Connect to an Instance with the Management Console
To launch an instance:
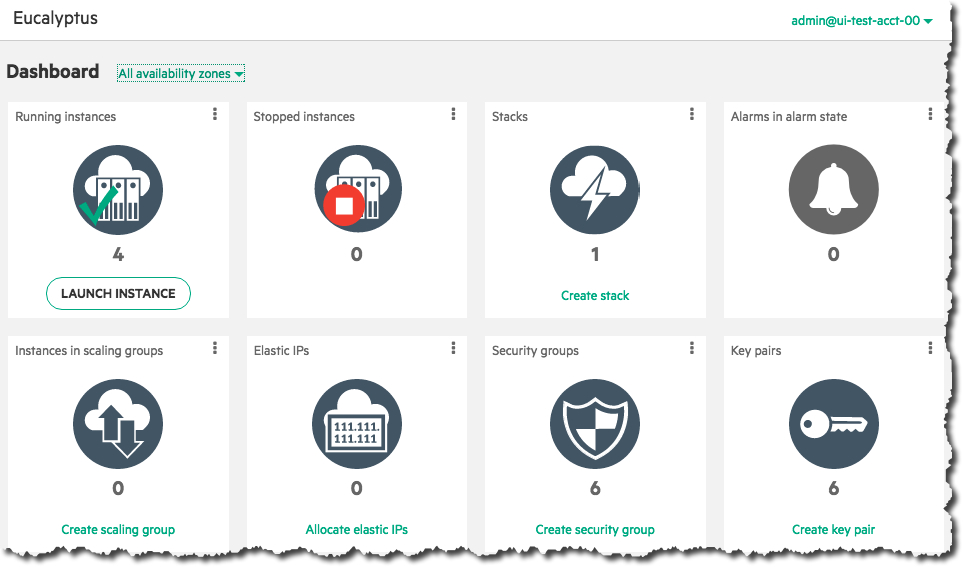
Click on the Launch Instance button on the main console page:
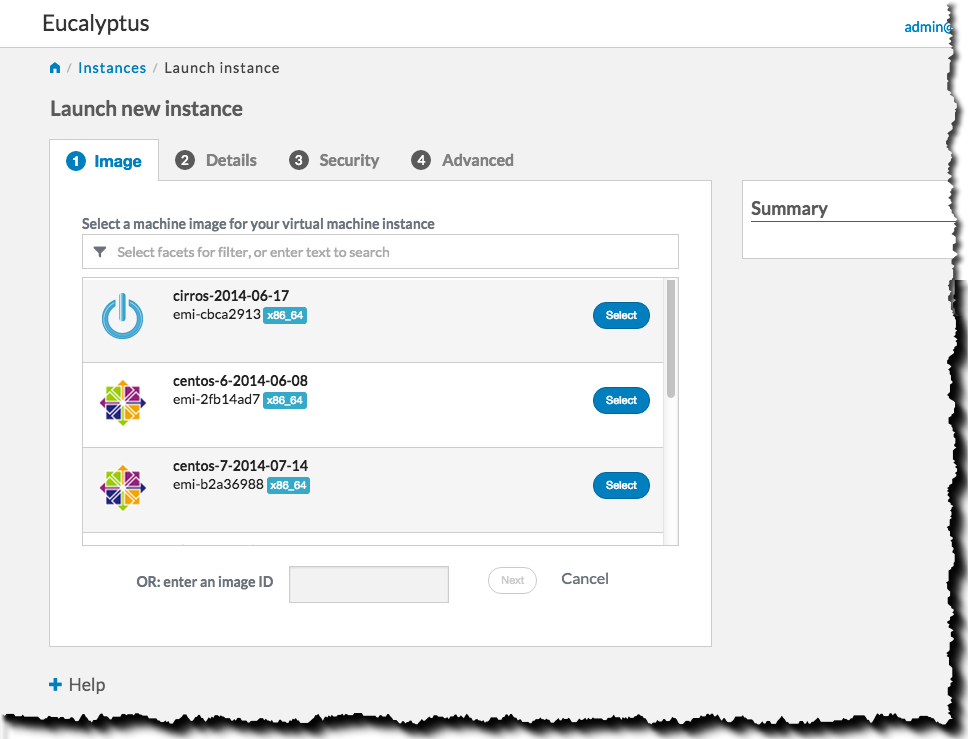
 Select an image from the list (for this example, we’ll select a CentOS image), then click the Next button:
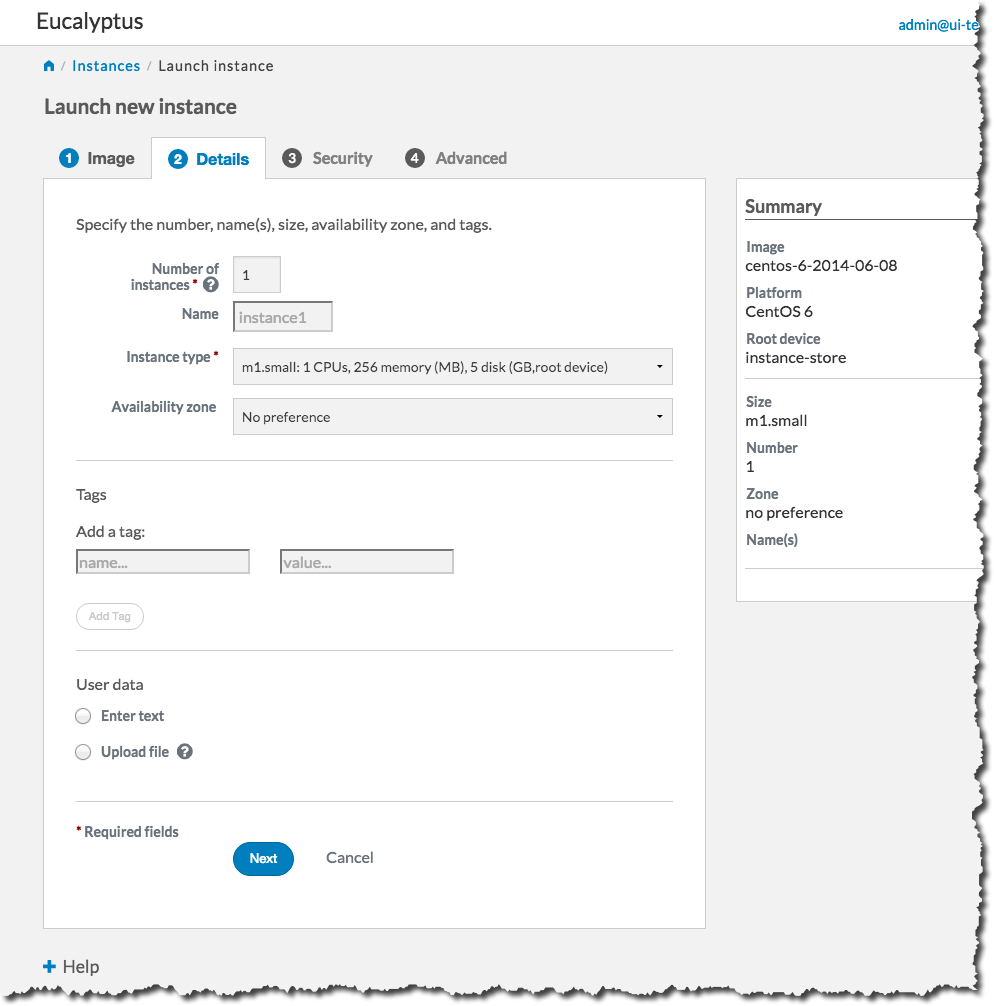
 Select an instance type and availability zone from the Details tab. For this example, select the defaults, and then click the Next button:
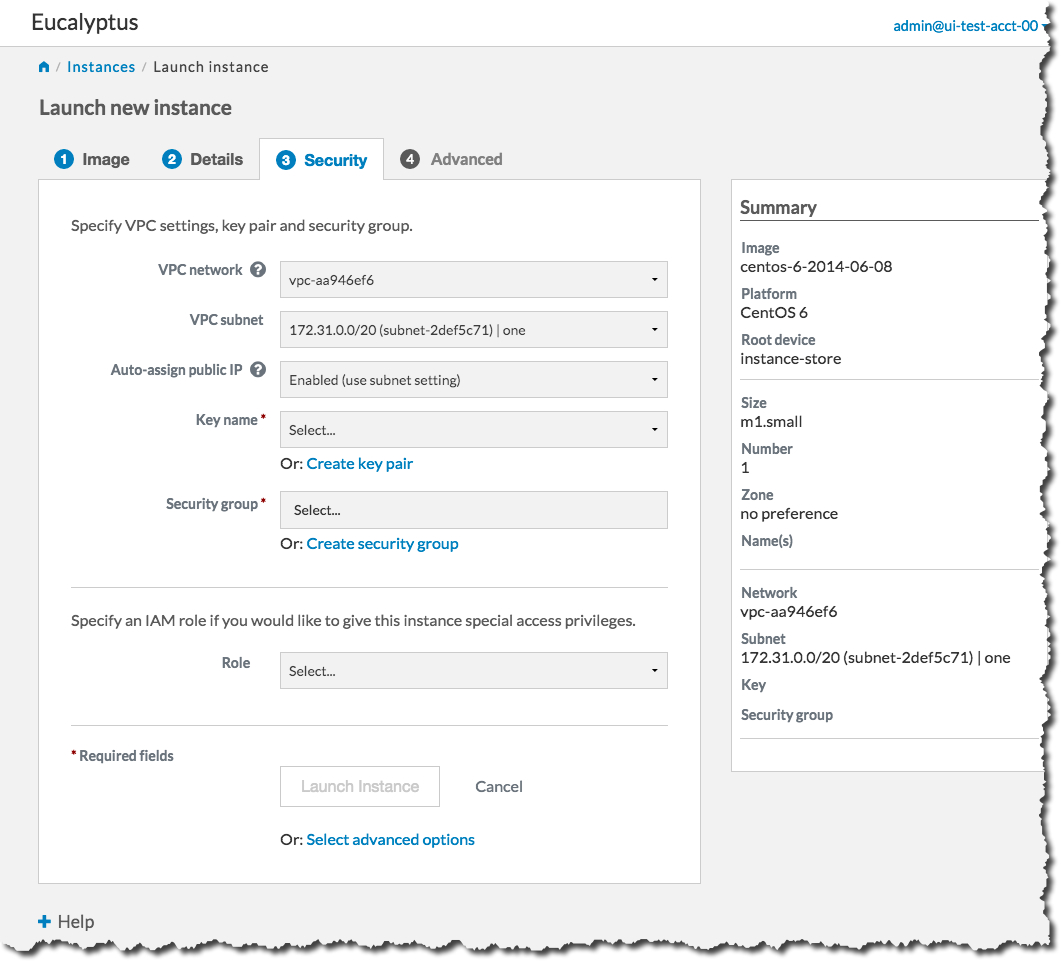
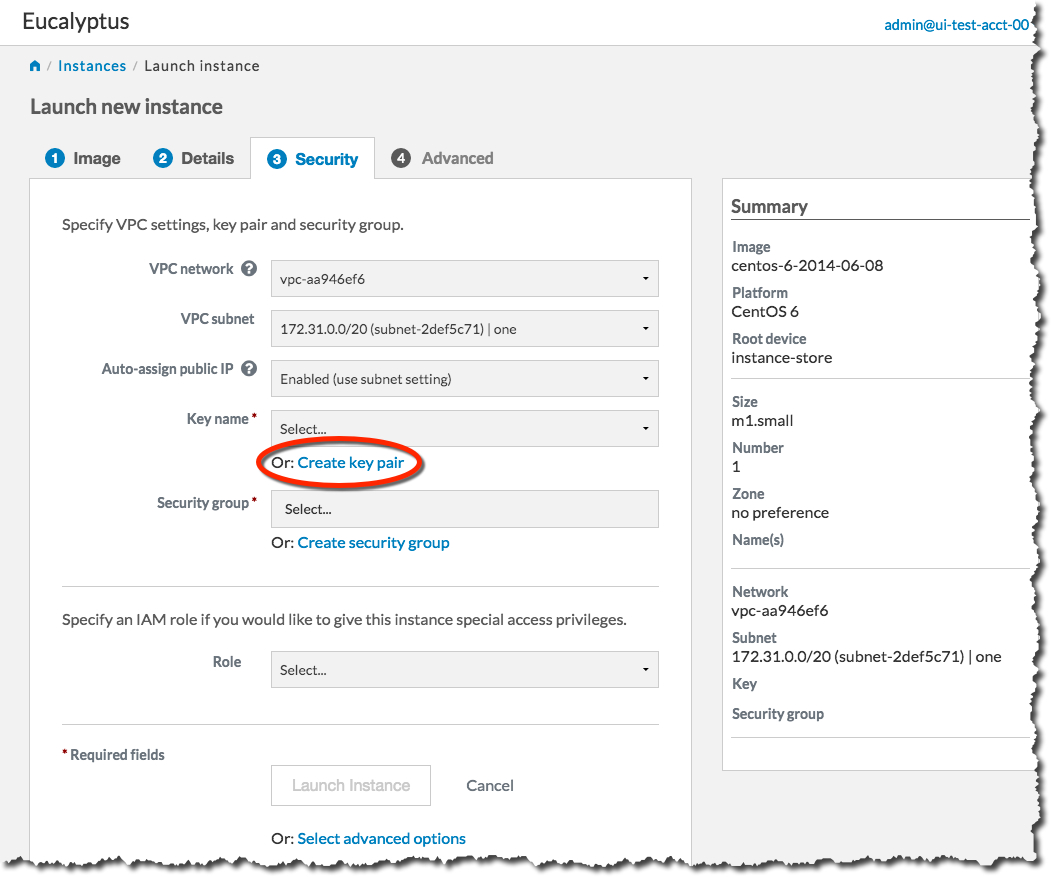
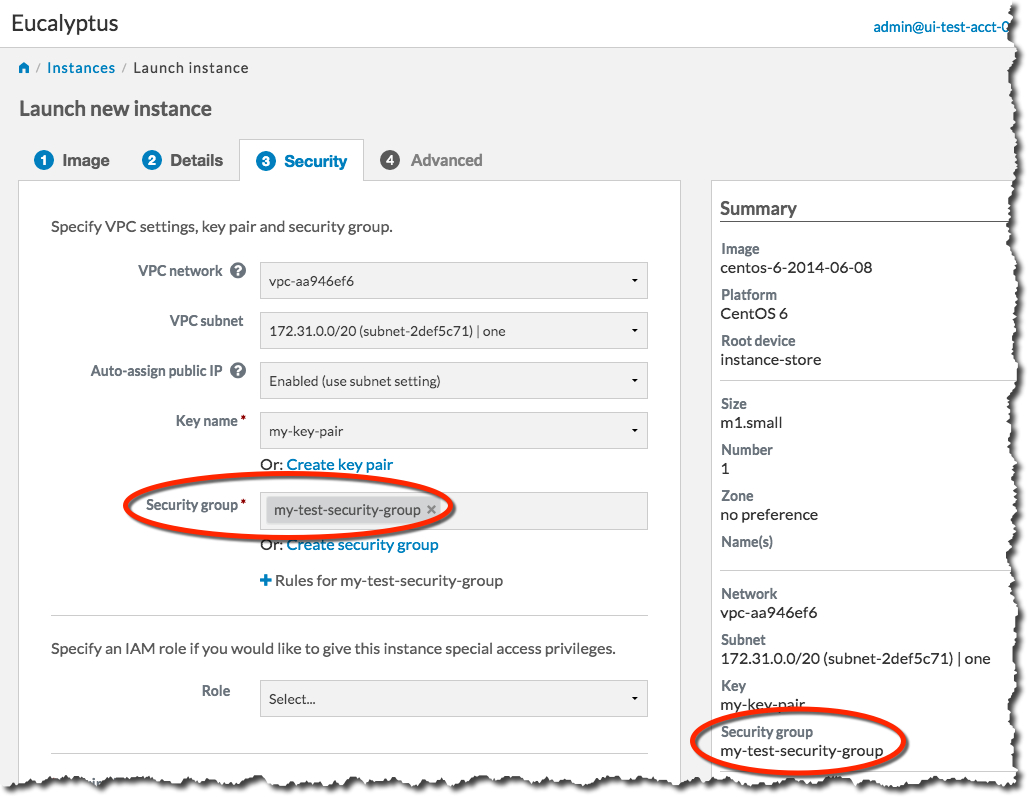
 On the Security tab, we’ll create a key pair and a security group to use with our new instance. A key pair will allow you to access your instance, and a security group allows you to define what kinds of incoming traffic your instance will allow.
 First, we will create a key pair. Click the Create key pair link to bring up the Create key pair dialog:
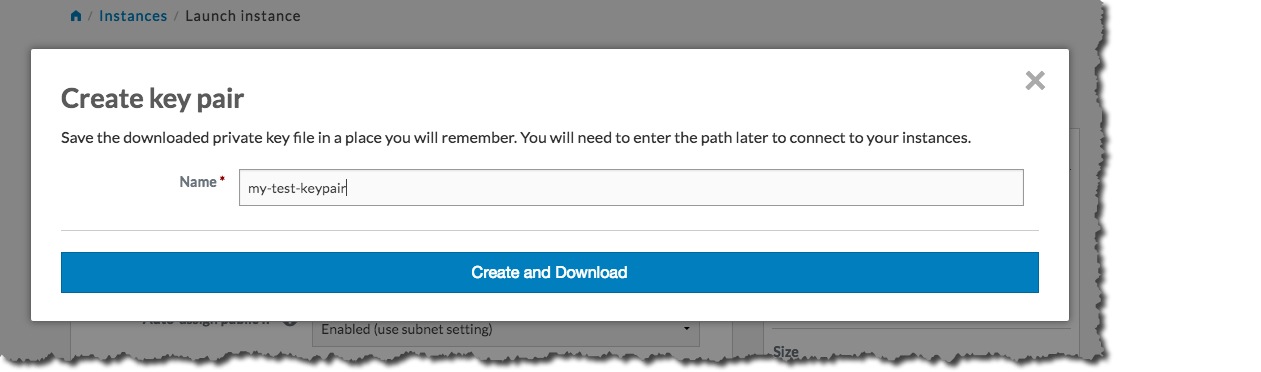
 Type the name of your new key pair into the Name text box, and then click the Create and Download button:
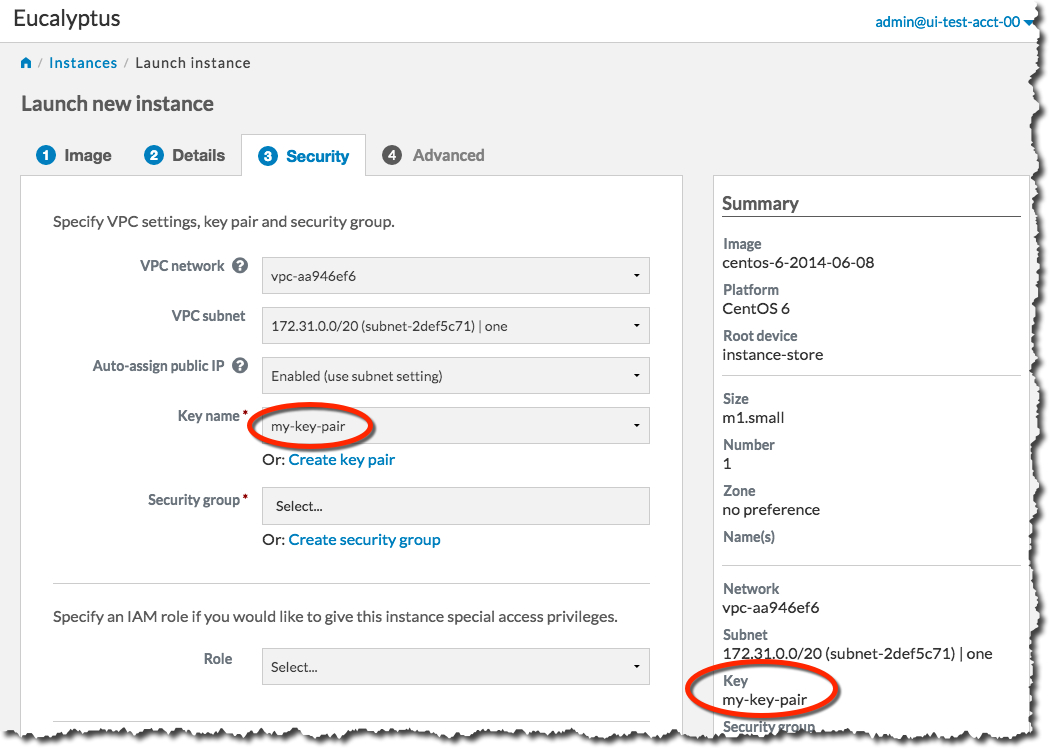
 The key pair automatically downloads to a location on your computer, typically in the Downloads folder. The Create key pair dialog will close, and the Key name text box will be populated with the name of the key pair you just created:
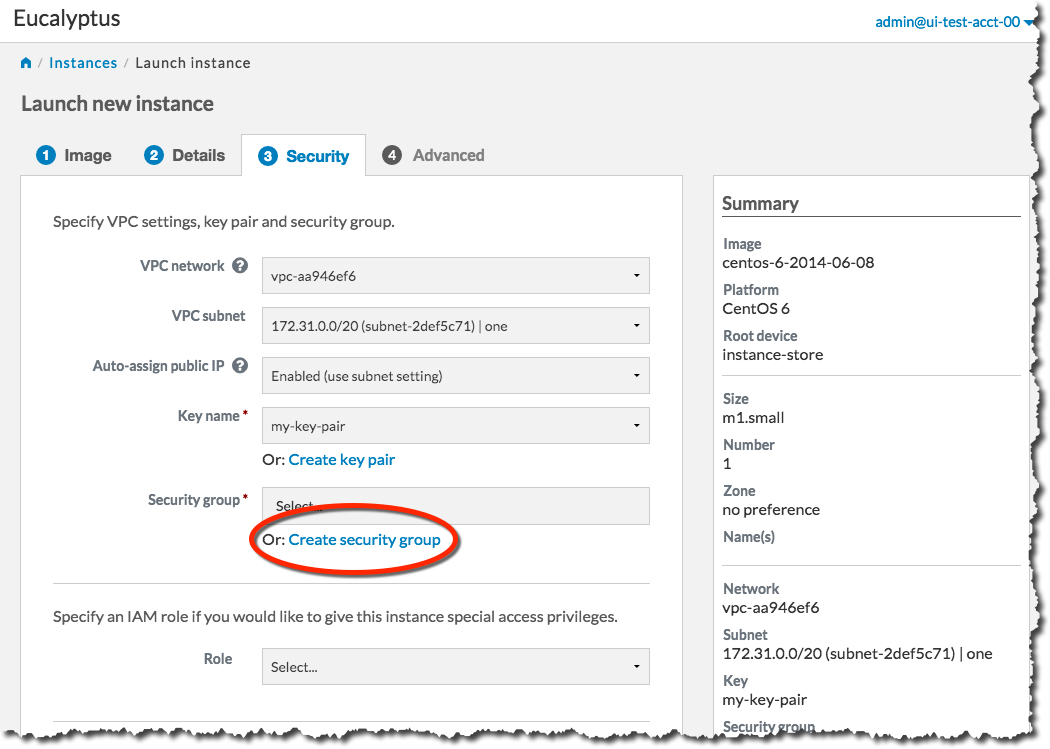
 Next, we will create a security group. Click the Create security group link to bring up the Create security group dialog:
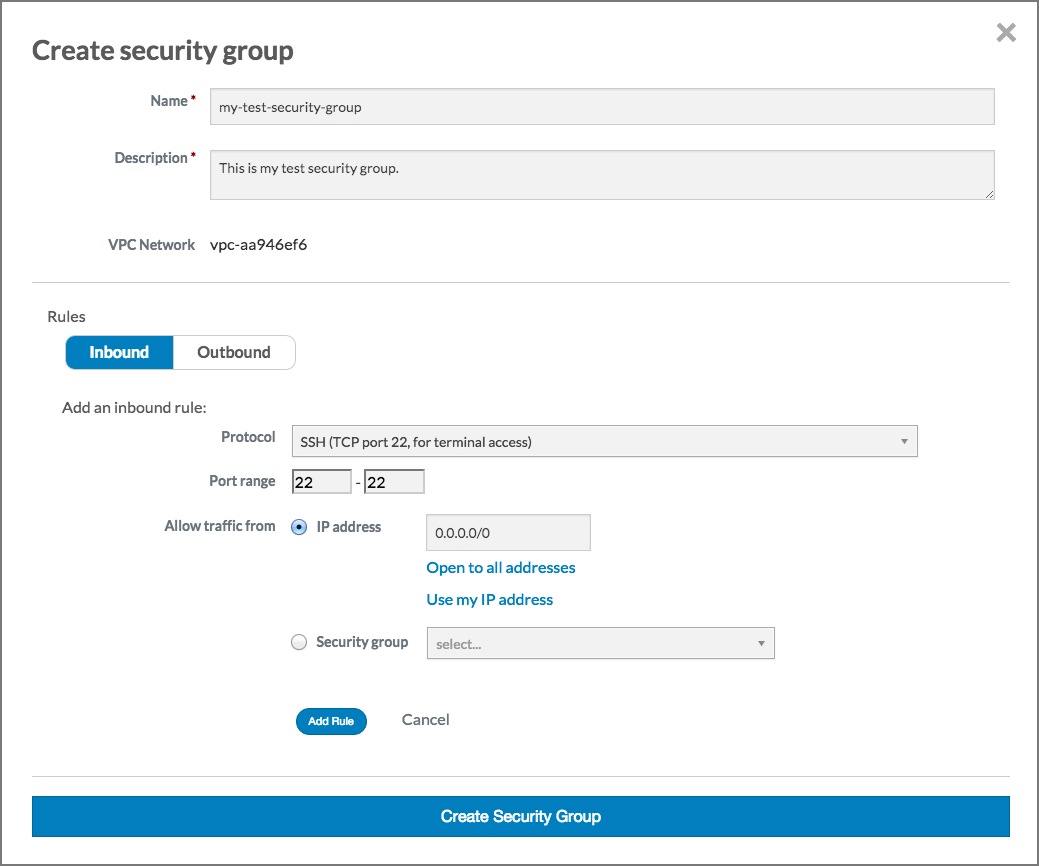
 On the Create security group dialog, type the name of your security group into the Name text box. Type a brief description of your security group into the Description text box. We’ll need to SSH into our instance later, so in the Rules section of the dialog, select the SSH protocol from the Protocol drop-down list box.
In this example, we allow any IP address to access our new instance. For production use, please use appropriate caution when specifying an IP range. For more information on CIDR notation, go to .
 Click the Add rule button. The Create security group dialog should now look something like this:
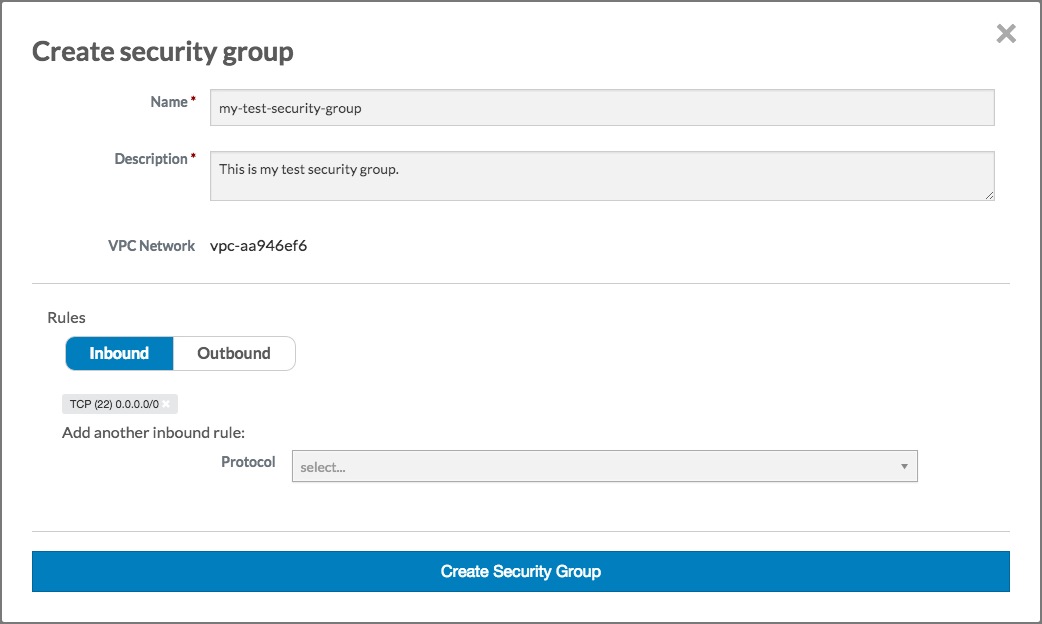 Click the Create security group button. The Create security group dialog will close, and the Security group text box will be populated with the name of the security group you just created:
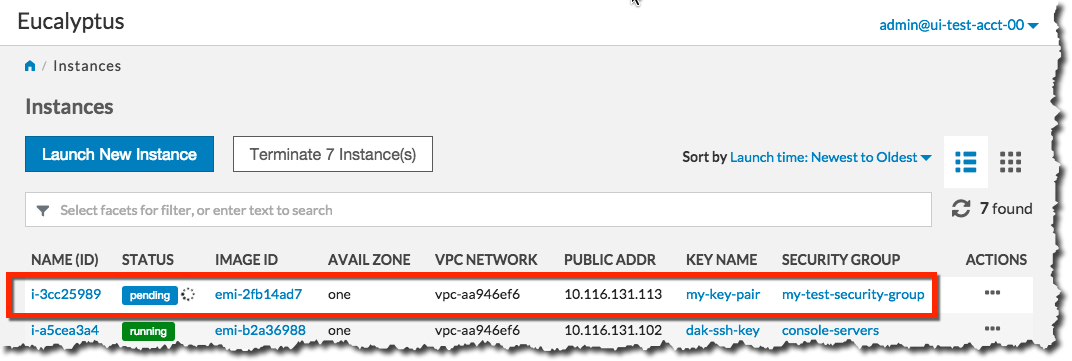
 You’re now ready to launch your new instance. Click the Launch Instance button. The Launch Instance dialog will close, and the Instances screen will display. The instance you just created will display at the top of the list with a status of Pending:
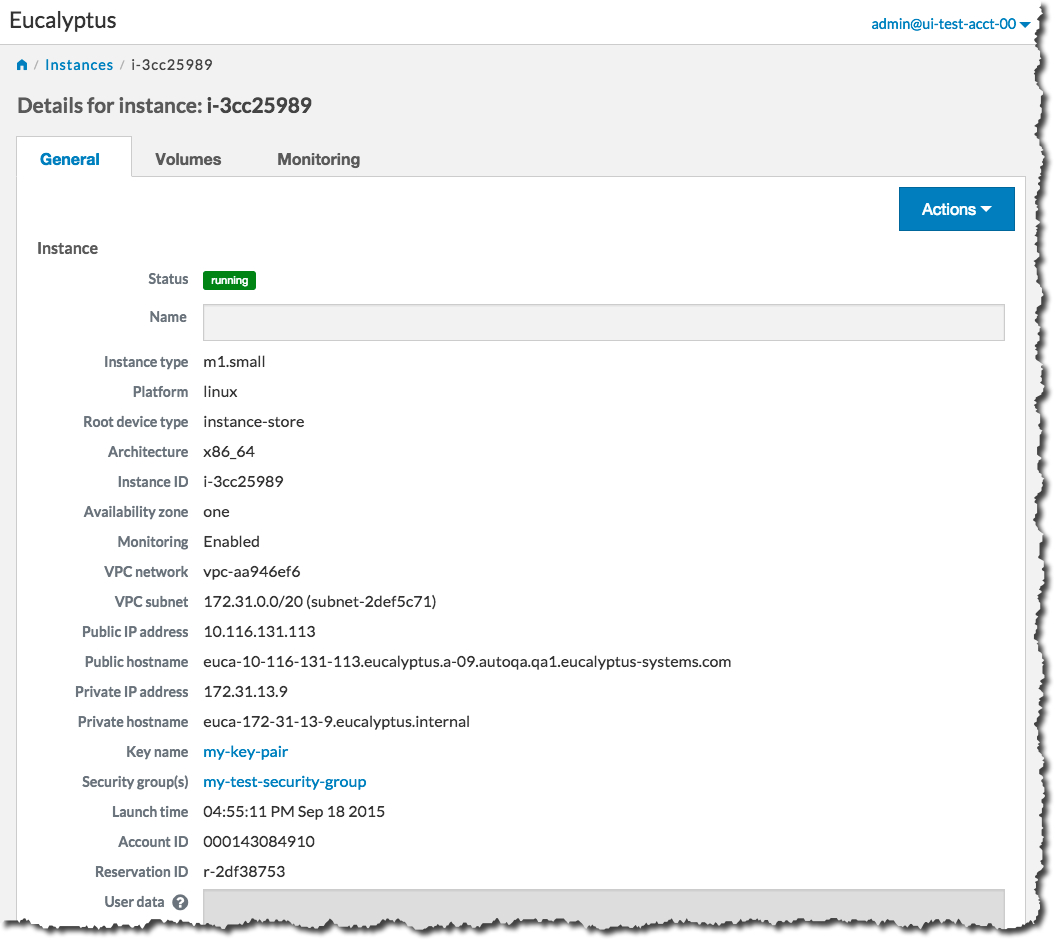
 When the status of your new instance changes to Running, click the instance in the list to bring up a page showing details of your instance. For example:
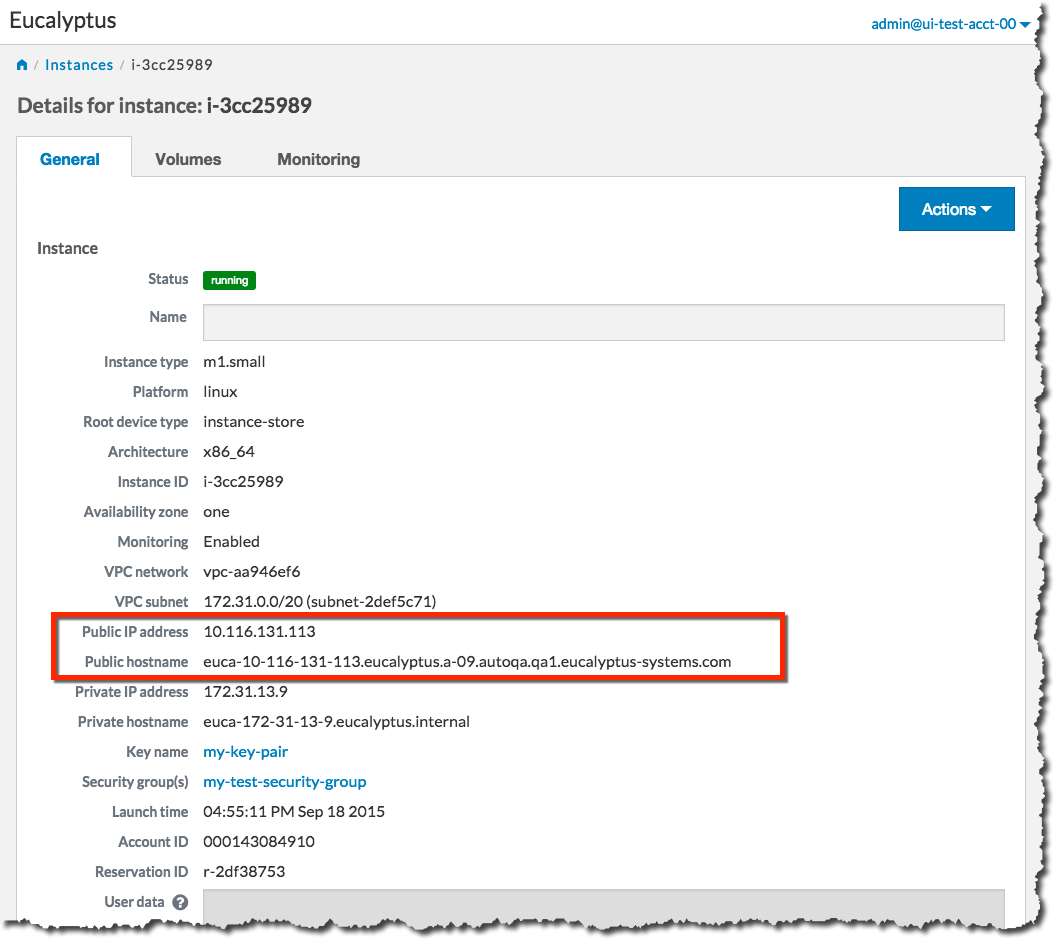
 Note the Public IP address and/or the Public hostname fields. You will need this information to connect to your new instance. For example:
 Using the public IP address or hostname of your new instance, you can now use SSH to log into the instance using the private key file you saved when you created a key pair. For example:
ssh -i my-test-keypair.private root@10.111.57.109